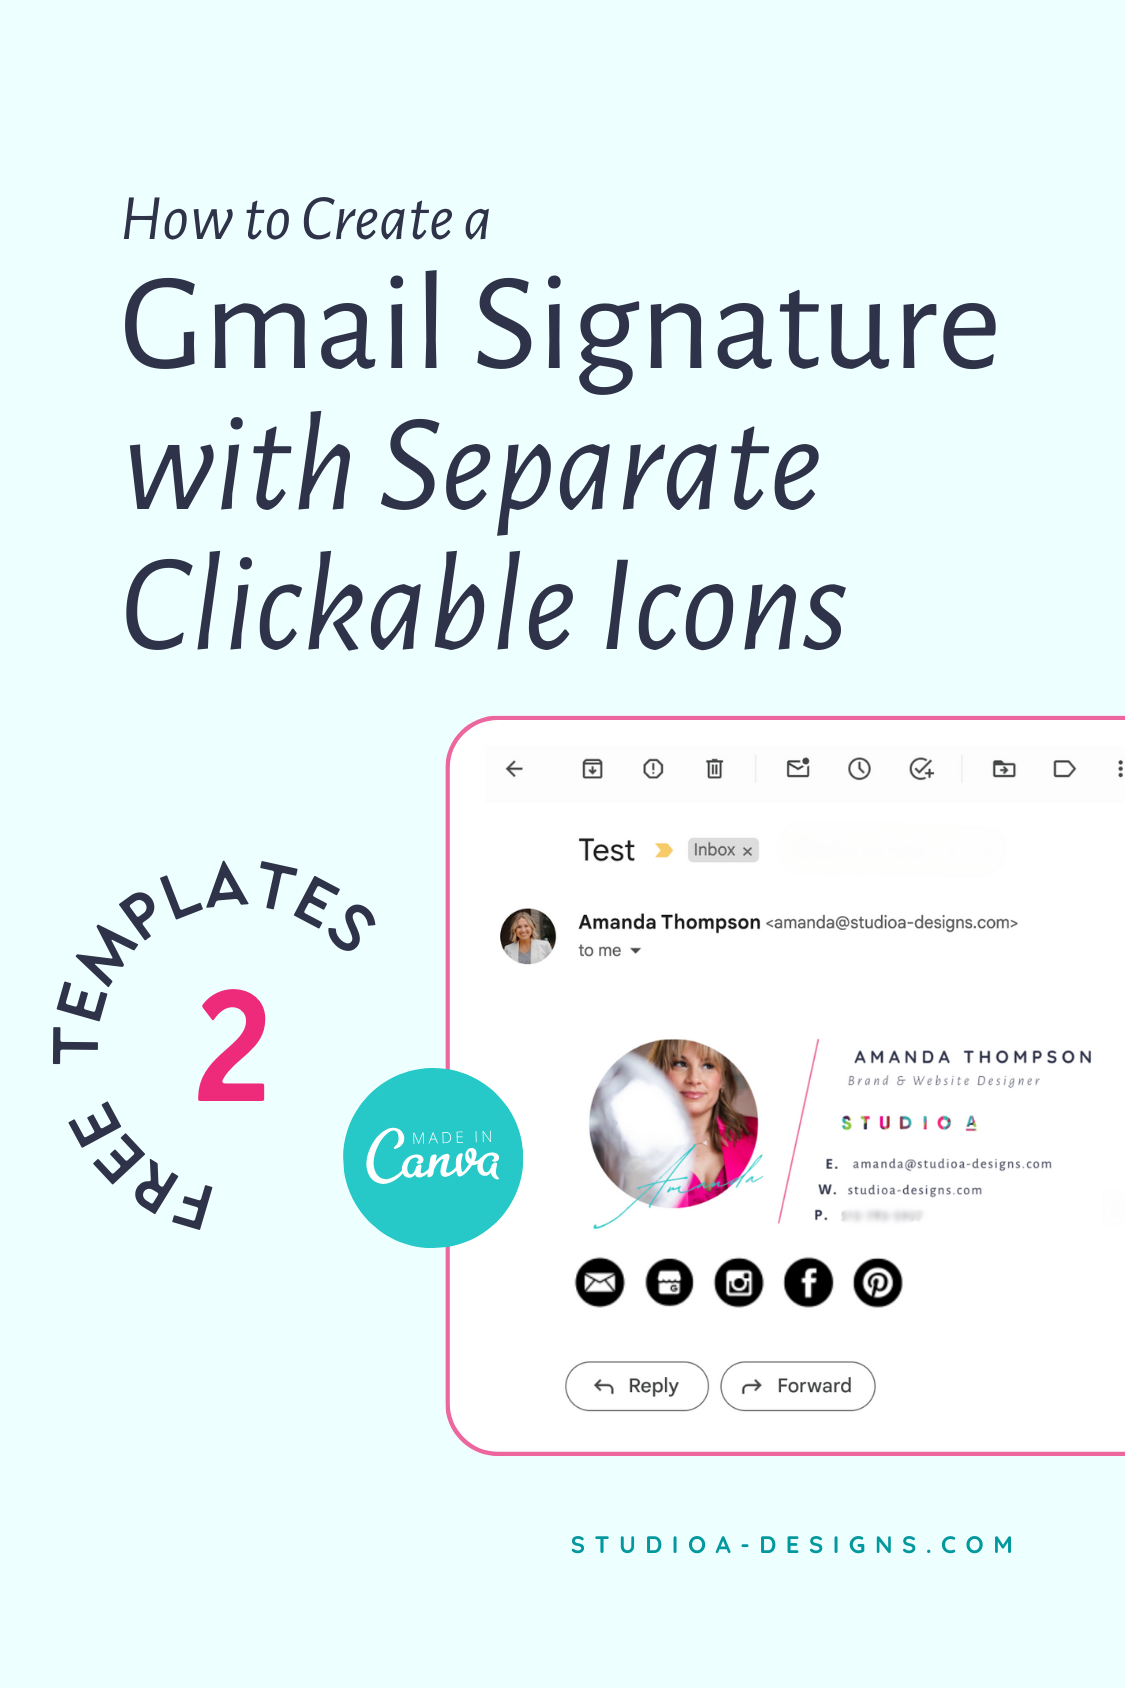
Is your email signature as exciting as watching paint dry? 🙈
Well, I’m here to help you inject some design aesthetic AND tech into your “digital handshake” so you take your email signature from snooze-fest to an on-brand hub for connecting your people to your online kingdom.
With clickable website links and social media icons, your email signature becomes a quick reference for connecting with you across the digital landscape. So, carve out some time (it will be worth it).
I’m here to show you how to Canva-fy your way to a clickable signature using Gmail with a few simple steps.
LET'S GET STARTED
What you'll need:
- A Canva account (free or Pro)
- Image editing software or steal and edit my email signature template
Steps to creating a top-notch email signature
1. Design the Body of your Signature in Canva
- Open Canva and create a new design. Choose a size suitable for email signatures (around 400 x 200 pixels is recommended).
- Design your signature layout (or steal mine HERE and swap out my text and images with your own). Include your name, title, company information (optional), and contact details in a professional and visually appealing way.
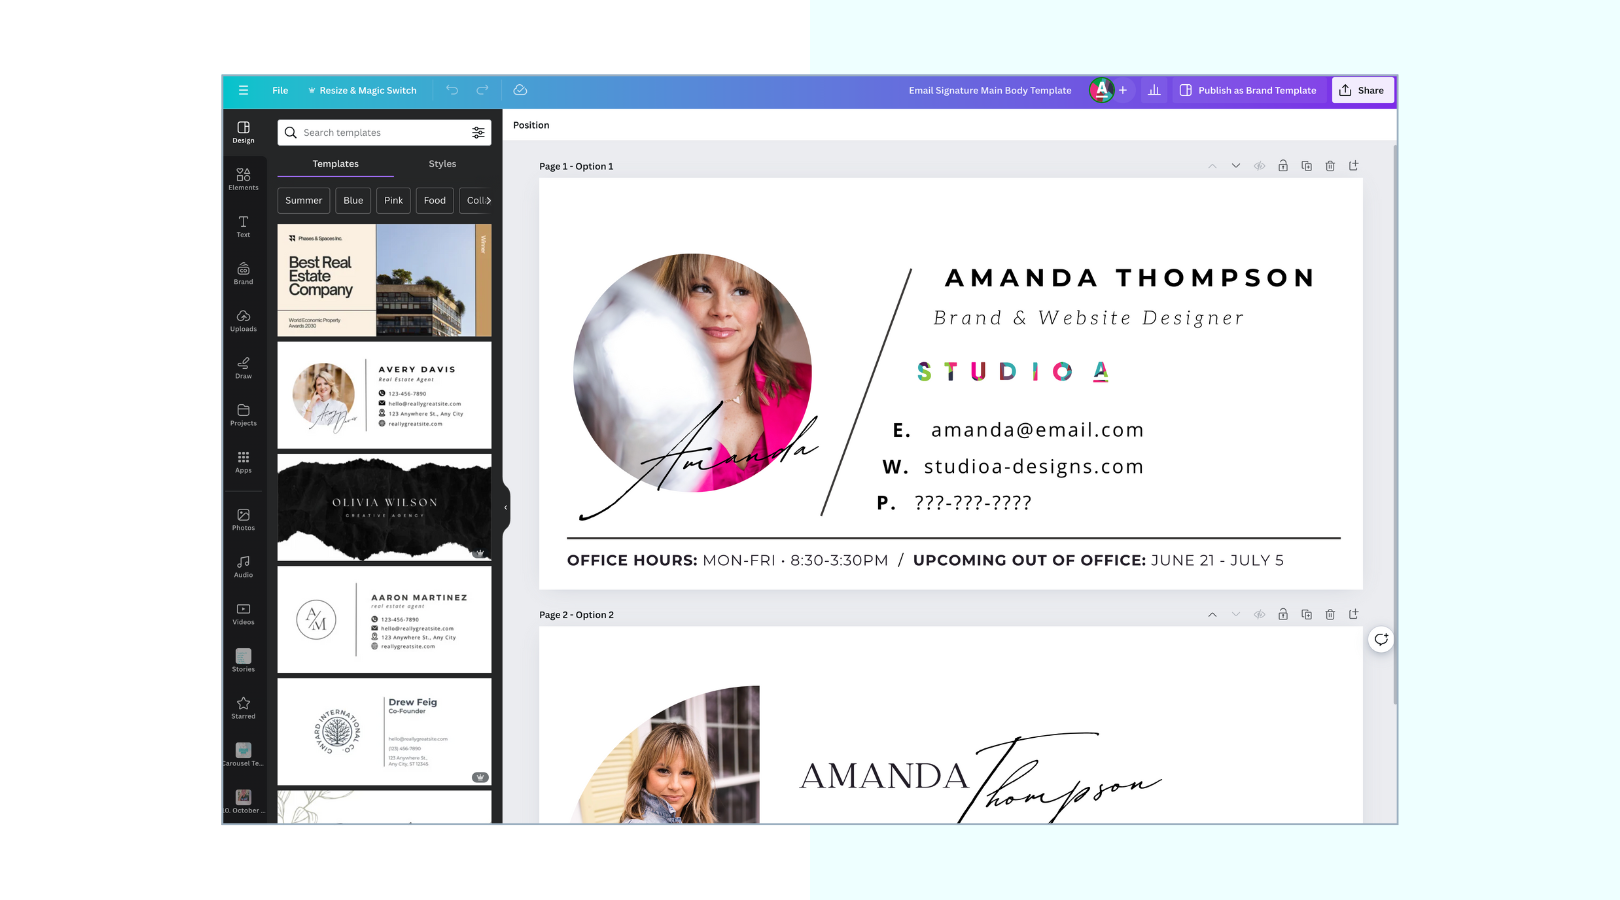
- Design Tip:
- Be mindful of your brand. Of course you’ll swap the contact info, but you’ll also want to switch fonts and colors as needed so it reflects your style and personality.
2. Download the Body Part of your Signature
Once your signature design is completed in Canva, download your file individually.
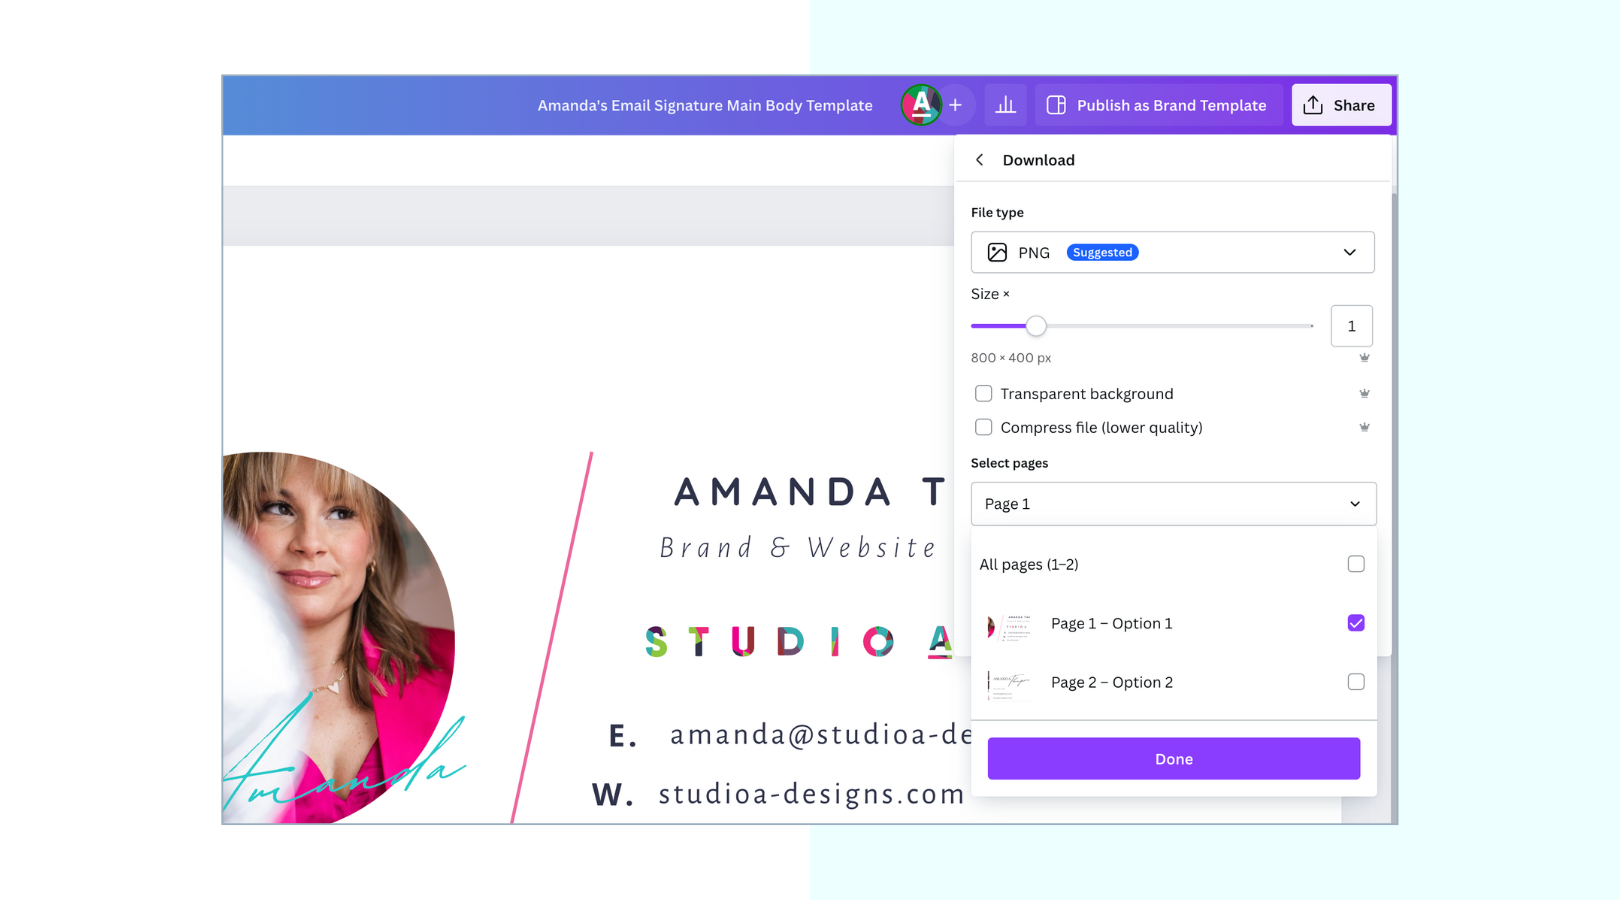
- Go to "Share" > Download and choose "PNG" as the filetype.
- Click the Select Pages drop-down and check the signature you want to use
- Click Done
- Click the download button - It will save to your downloads folder on your computer or your photos app in on your device
- You'll access this file in few minutes after the next couple of steps
3. Edit Your Icons for your Email Signature
- Create another new design for icons in Canva. (50x50 pixels are good dimensions for that). You can use Canva's library of icons or upload your own social media or website icons. I created a Canva template that uses the most common icons HERE. You can edit them using your own brand colors.
Important: Don't add hyperlinks to the icons within Canva in this method (this functionality is only available for Canva Pro users). You will be adding hyperlinks later.
4. Download Your Icons as Separate Images
- Once your icon designs are complete, download all the icons you want to use individually as PNG files.
- Go to "Share" > Download and choose "PNG" as the filetype.
- Click the Select Pages drop-down and check the icons you want to use
- Click Done
- Click the download button - It will save to your downloads folder on your computer or your photos app in on your device
5. Set Up Your Signature in Gmail:
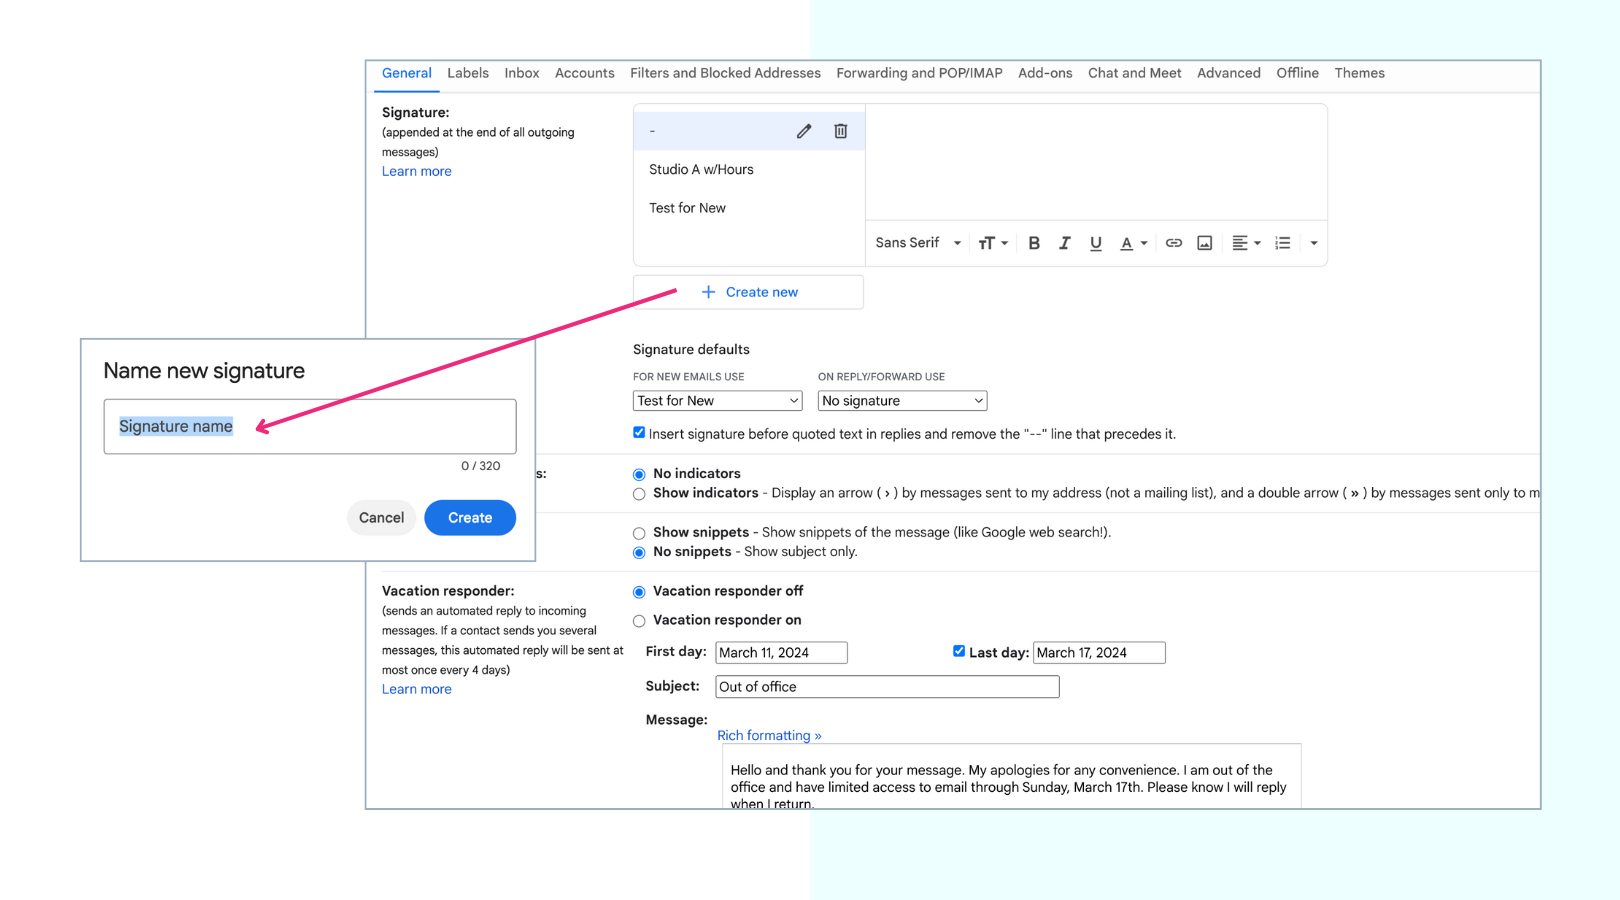
- To access Gmail settings, click the gear icon at the top right corner and select "See all settings."
- Navigate to the Signature section: Under the "General" tab, scroll down to the "Signature" section.
- Create or Choose a Signature: Click "Create new" to create a new signature or select an existing one.
6. Insert Images & Icons:
- Insert Body Signature Image: Click the "Insert image" icon for the body signature first.
Quick Tips: - Do not drag your image from your desktop into the signature field. It won’t work, you have to use the “insert image” icon for each image you insert.
You may want to adjust the size if you feel it is too large - I adjusted mine to reduce down to the “large” size.
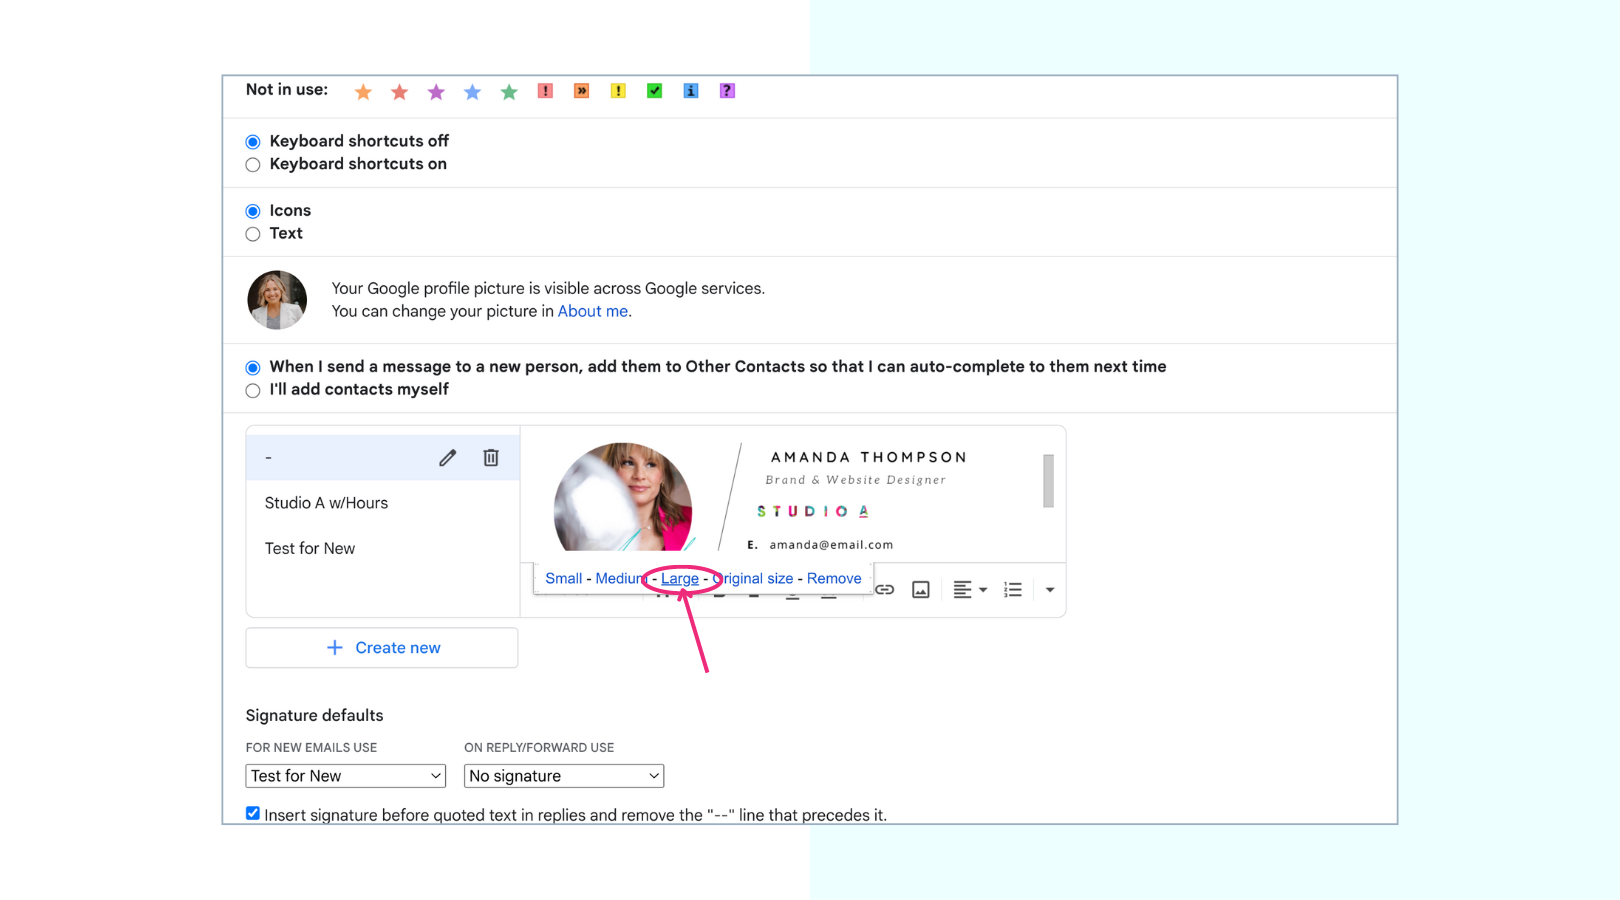
- After inserting the body signature, arrow over so your curser is at the right side of the body signature image and click the return button on your keyboard to hard return to the next line to prepare for inserting your icons.
- Insert Clickable Icons:
- Insert your left-most icon PNG image file individually
- Highlight the image icon: Select the image icon by highlighting it
- Add Hyperlinks: Once the icon is highlighted, click the "Insert Link" icon (paperclip symbol) and paste the website URL you want to link the image icon to. Click "Save".
- Repeat this process for each icon, inserting the icon png and then linking each individually to their corresponding website URLs.
Quick Tips: If you would like to link something other than a URL like a click-to-call or an email address, use these: - For a clickable phone number
- Use tel and a colon and a plus sign before the phone number
- Example: tel:+0000000000 (do not use dashes, spaces or dots to separate any characters)
- For a clickable email address
- Use mailto and a colon before the email address
- Example: mailto:amanda@mail.com (no space between the colon and your email address)
8. Finalize and Save:
- Adjust Image Size and Position: Resize and position each uploaded icon image appropriately within the signature box to match your design. Use consistent spacing and alignment between your text labels and icons for a polished look.
- You can move any icons by highlighting and dragging them to a different position. Position your highest-priority icons start at the left side.
- Choose When to Apply Signature: Select if you want the signature to appear automatically for all emails or only for new messages. Standard practice is for a new message to have the full signature and reply emails to have an abbreviated version of the signature.
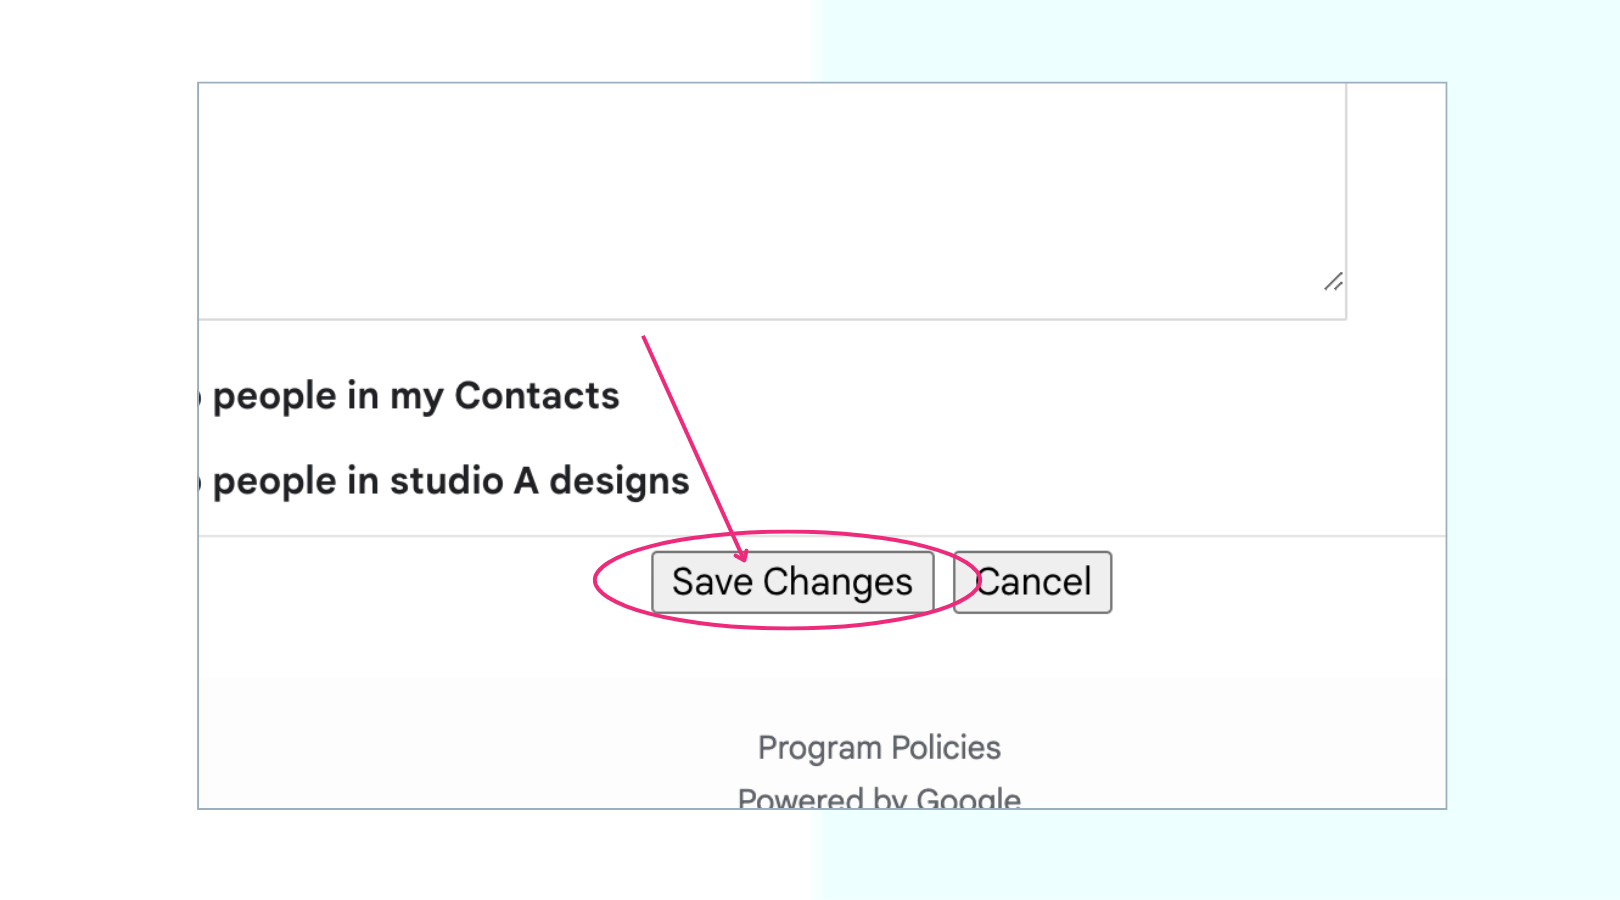
Save Changes: Scroll down to the bottom of the page and click "Save Changes."
9. Test Your Signature:
- Compose a new email to test your signature. Click on each text label to verify it links to the correct website URLs.
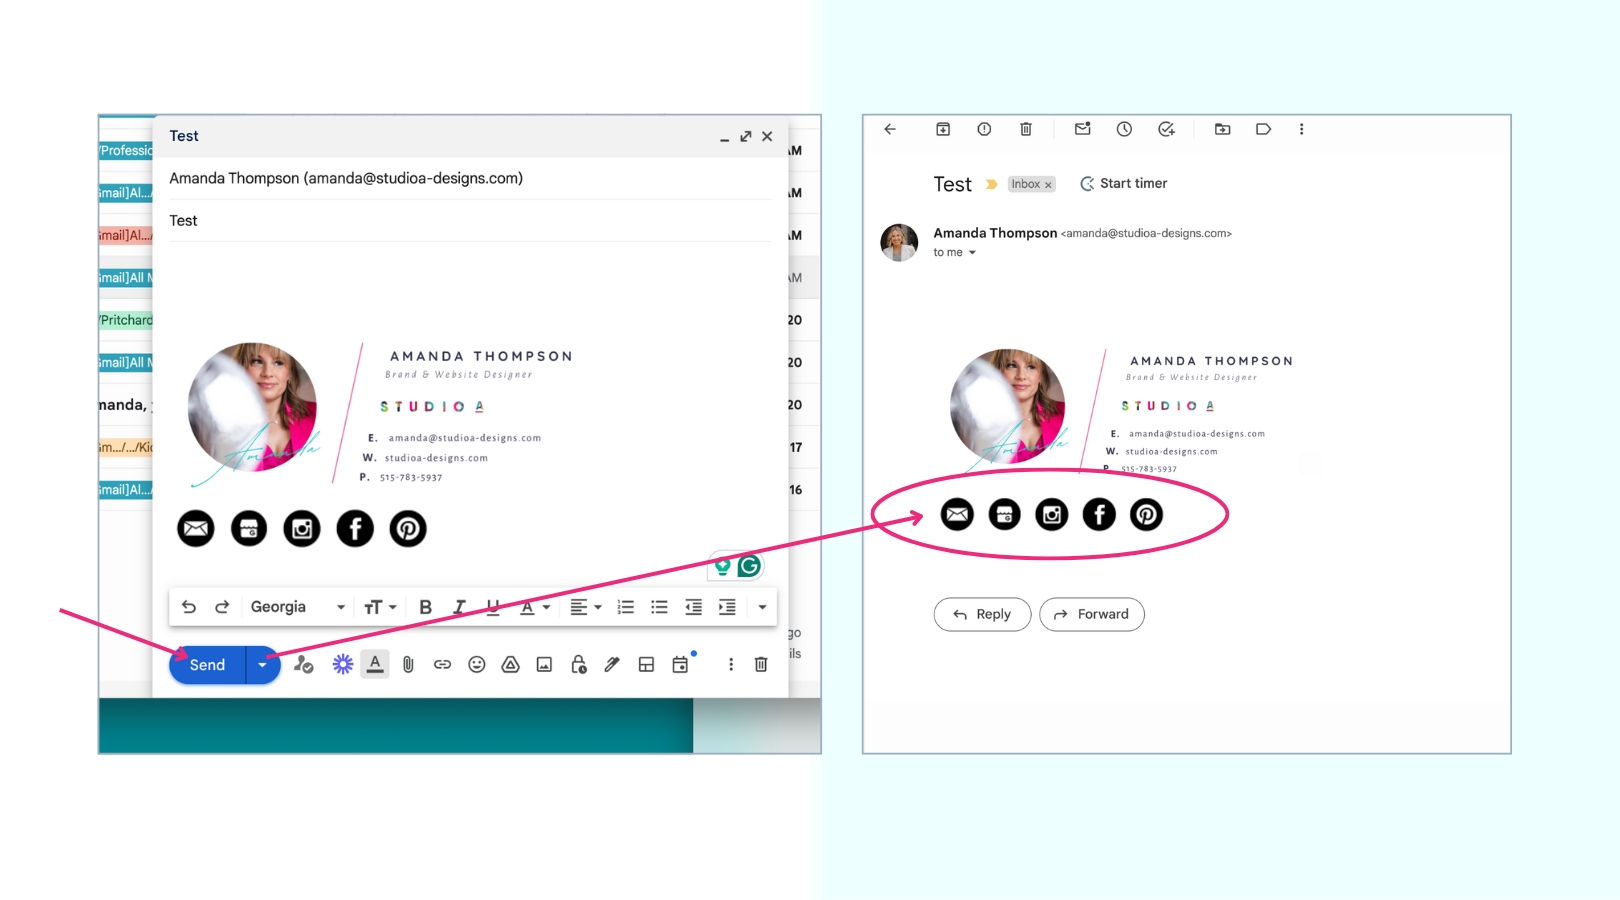
Way to take your Email Signature up a notch!
So there you have it! With a little Canva magic and these handy steps, you've transformed your email signature to a clickable hub connecting you to your online world. Now, go forth and conquer those inboxes! Remember, a stellar signature is like a digital business card – it speaks volumes about your professionalism and personality. So use your creativity, personalize your design, and get ready to wow everyone you email!
Bonus Tip: Feeling overwhelmed by the clickable stuff? Don't sweat it! Canva offers a plethora of pre-made email signature templates to inspire you if you don’t want to worry about this particular template. Just remember to swap in your information and brand colors to make it your own.
Here’s to making your brand as on-brand as possible!
Spread the word! Share this post with your network to help others ditch the drab email signatures.
Your designer friend always,

The A-List is your 60-second inbox scroll for local brand and website tips, savvy small biz resources and the take-aways you need to get through this crazy thing called entrepreneurship.
Join the email community!
Email Community Signup
BLOG TOPICS
BROWSE RECENT POSTS
I get to use creativity everyday to help entrepreneurs focus on their passions to discovering their brand's "sweet spot" in the marketplace...and I absolutely LOVE IT!
I'd love to connect with you to chat more about your business.


